Friday, 22 June 2012

Chocolate Fondants.

Chocolate Fondant.


When you hear the words "chocolate fondant" your mouth just waters doesn't it. With its gooey chocolaty exterior and oozing truffle like centre its very heard to resist. Although i ind myself feeling very guilty after eating them (not good for my ever expanding waistline) But hey ho, you only live once and all that jazz... So if you want to know how to make this gorgeous desert carry on reading!!

This recipe makes around 9-10 medium sized ramequins.
Pre-heat your oven to 200C/fan 180C/Gas 6.

You will need...

 50g melted butter , for brushing
cocoa powder , for dusting
200g good-quality dark chocolate , chopped into small pieces
200g butter , in small pieces
200g golden caster sugar
eggs and 4 yolks
200g plain flour

And this is how you make them...

  1. First get your moulds ready. Using upward strokes, heavily brush the melted butter all over the inside of the pudding mould. Place the mould in the fridge or freezer. Brush more melted butter over the chilled butter, then add a good spoonful of cocoa powder into the mould. Tip the mould so the powder completely coats the butter. Tap any excess cocoa back into the jar, then repeat with 1 the next mould.
  2. Place a bowl over a pan of barely simmering water, then slowly melt the chocolate and butter together. Remove bowl from the heat and stir until smooth. Leave to cool for about 10 mins.
  3. In a separate bowl whisk the eggs and yolks together with the sugar until thick and pale and the whisk leaves a trail; use an electric whisk if you want. Sift the flour into the eggs, then beat together.
  4. Pour the melted chocolate into the egg mixture in thirds, beating well between each addition, until all the chocolate is added and the mixture is completely combined to a loose cake batter.
  5. Tip the fondant batter into a jug, then evenly divide between the moulds. The fondants can now be frozen for up to a month and cooked from frozen. Chill for at least 20 mins or up to the night before. To bake from frozen, simply carry on as stated, adding 5 mins more to the cooking time.
  6. Heat oven to 200C/fan 180C/gas 6. Place the fondants on a baking tray, then cook for 10-12 mins until the tops have formed a crust and they are starting to come away from the sides of their moulds. Remove from the oven, then leave to sit for 1 min before turning out.
  7. Loosen the fondants by moving the tops very gently so they come away from the sides, easing them out of the moulds. Tip each fondant slightly onto your hand so you know it has come away, then tip back into the mould ready to plate up.
  8. Starting from the middle of each plate, squeeze a spiral of caramel sauce - do all the plates you need before you go on to the next stage. (OPTIONAL)
  9. Sit a fondant in the middle of each plate. Using a large spoon dipped in hot water, scoop a 'quenelle' of ice cream.
  10. Carefully place the ice cream on top of the fondant, then serve immediately. Repeat with the rest of the fondants.
ENJOY!!! <3



Monday, 14 May 2012

Scones.

Fruit Scones.
180 degrees 20-25 minutes.


Oh the humble fruit scone! They've been around for centuries! You can't beat a freshly baked English scone with a generous dollop of jam and clotted cream, oh and don't forget a nice hot brew! 

Here i have a gorgeous moist scone recipe which is very simple to make! Heres how! 

This recipe makes around 15 - 20 scones. 

2lb Flour. 
8oz Butter.
8oz Sugar.
2 Tbsp Baking Powder. 
3/4pt Milk (add to bind, may not need all) 
A few handfuls of sultanas and raisons. 

1 Egg beaten to glaze. 

Firstly either by hand or in a food mixer, add the flour, butter, sugar and baking powder into a bowl and mix until the butter has crumbled into the flour mix. Once mixed add in your fruits. Then carry on mixing whilst slowly pouring in the milk. You want your mix to bind together. you don't want it to be sloppy. 

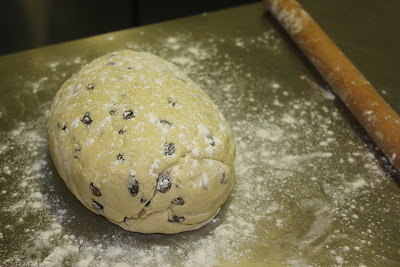
Once mixed place onto a floured surface and kneed into a ball. 


Roll out the mixture until it is around 2inches thick. Using a serrated cutter cut out your scones and place onto a lined (using greaseproof paper) tray. 


Once you have cut all your scones out, glaze with your egg wash and place into the pre-heated oven. They should take 20-25 minutes to cook depending on your oven. 
Easy way to check if they are cooked it to either check the bottom of the scone, if its coloured a light brown its done. Or you can split a scone in half to check for any doughy patches. 

Let your scones cool on a cooling rack and then enjoy!!

Joely <3


Thursday, 10 May 2012

Flappyjacks!


Or better known as "flapjack", as you know there are all different types of flapjack, chewy, hard ect. But this flapjack is a gorgeous chewy thick flapjack that melts in the mouth. It's so easy to make! And can be altered to your own tastes by adding in chopped apricots & sultanas or chocolate chips ect... I opted for chocolate chips as i had run out of apricots! But it still tasted just as gorgeous :) Heres how you make them...

Preheat your oven to 180 degrees. 

Place -
12oz of butter
4oz caster sugar 
10oz golden syrup
In a pan and gently melt together (don't boil)

One its has all melted together pour it over 18oz porridge oats and mix together until combined.

Now will be the perfect time to add any extra goodies into your flapjack like chocolate chips or mixed fruits. Or if you prefer to have your flapjack as it is then just leave it at that! 

Place the mix into a medium sized (lined) tin.

And cook for 15-20 minutes until golden. Once cooked let it cool and enjoy!!

Joely <3

Tuesday, 24 April 2012

Raspberry & White Chocolate Macaroons!!


Ohh macaroons! I think its fair to say that macaroons have taken the pastry world by storm. These colourful little bundles of meringue wonderfulness have been around for many years & gained a high status. I've been dying to have a go at making these little beauties and after months of debating it i thought i would give them a whirl! And i must say i wasn't disappointed with the results! I was pretty sure these macaroons were going to turn out disastrous but by some random act of god they turned out perfectly! I made a basic macaroon mix by using the boiling sugar method, and then filled them with a raspberry & white chocolate cream cheese filling. Heres how i made them! 

You will need!

You will need a piping bag fitted with a 1cm/½in nozzle & a baking sheet lined with greaseproof, oh and a sugar thermometer would be handy!

125g/4½oz icing sugar
  • 125g/4½oz ground almonds
  • 90g/3½oz free-range egg whites
  • 2 tbsp water
  • 110g/4oz caster sugar
  • food colouring (optional) (i used red) 

    This is a recipe from Lorraine Pascale, you can find it (here)

    As for the filling i made a basic butter icing 
    8oz Butter
    16oz Icing sugar
    Then i added 2 large tablespoons of cream cheese, now taste the frosting and add more if you would like a stronger flavour. 
    At this point you may find your butter icing has gone rather sloppy (don't panic) Just give it a vigour us whisk until it regains a stiffer consistency.
    Then add a handful of crushed fresh raspberries and some melted white chocolate 
    (about 3 tbsps) 

    Now to make the macaroons...

    1. Preheat the oven to 170/C/325F/Gas 5 and line a large baking tray with baking paper.
    2. Put the icing sugar, ground almonds and 40g/1½oz egg whites together in a large bowl and mix to a paste.
    3. Put the water and caster sugar in a small pan and heat gently to melt the sugar, then turn up the heat and boil until the mixture starts to go syrupy and thickens - I don’t use a thermometer but if you prefer to use one, it should read 115C/239F at this stage.
    4. Whisk the remaining 50g/2oz egg whites in a small bowl until medium-stiff peaks form when the whisk is removed from the bowl, then pour in the sugar syrup, whisking until the mixture becomes stiff and shiny. For coloured macaroons, add a few drops of food colouring. Tip this meringue mixture into the almond paste mixture and stir gently until the becomes stiff and shiny again.
    5. Spoon into the piping bag. Pipe a little mixture under each corner of the baking paper to stop it sliding around. With the bag held vertically, pipe 4cm/1½in flat circles onto the lined tray, about 2cm/¾in apart, twisting the bag after each one. The mixture should be quite loose to give a smooth finish. The piping will leave a small ‘tip’ on each circle so, when they’re all piped, give the tray 2–3 slams on a flat surface to flatten them. 
    6. Leave to stand for 30 minutes to form a skin then bake in the oven for 12–15 minutes with the door slightly ajar until firm. Remove from the oven, lift the paper 
      off the baking tray and leave the macaroons to cool on the paper.

      Now add a small dollop of your cream cheese frosting on one half of your macaroon and then sandwich it together with another half.

      Now enjoy....

      Joely <3


Red Velvet Cupcakes.


So like most avid bakers i've been on a never ending hunt for a foolproof red velvet cupcake recipe! And i believe i may of found one. Apart from the fact that these beauties are more of a burgundy than a bright red, but that can easy be adjusted by a few more drops of red food dye! These cupcakes are quite possibly the lightest cupcakes i have ever made, i put this down the the dubious amount of buttermilk this recipe required! The light chocolatey taste and the creamy silky cream cheese frosting that finishes these off are simply divine. Now i'm sure you are all wondering how to make these, here is how i made them...
(unfortunately the recipe is american so get out your cup measurements) 

2 1/2 cups of sifted cake flour (if you were like me i'm sure you are now wondering OMG WHAT IS CAKE FLOUR if you don't have any to hand here is a simple solution (cake flour substitute)

1 heaped teaspoon of baking powder

1tsp Salt

2tbsp Cocoa powder

56mls Red food dye

1/2 cup Softened unsalted butter

1 1/2 cups Caster sugar

2 Whole eggs

1tsp Vanilla extract 

1 cup Buttermilk

1tsp White vinegar

1tsp Baking Soda (Bi-carb)

For the frosting!

8oz (226gr) Unsalted butter

12oz (340gr) Cream cheese

3 3/4 cups Icing sugar

1tsp Vanilla extract

A small amount of red food dye

Method...

  1. Preheat oven to 180 degrees Celsius. Line two 12-cup muffin tins or silicone pans with cupcake liners.
  2. Sift together the cake flour, baking powder, and salt into a medium bowl and set aside. In a smaller bowl, mix food coloring and cocoa powder to form a thin paste without lumps and set aside
  3. In a large bowl, using a hand mixer or electric mixer, beat butter and sugar together until light and fluffy, about three minutes. Beat in eggs, one at a time, then beat in vanilla and the red cocoa paste, scraping down the bowl with a spatula as you go. Add one third of the flour mixture to the butter mixture, beat well, then beat in half of the buttermilk. Beat in another third of flour mixture, then second half of buttermilk. End with the last third of the flour mixture, beat until well combined, making sure to scrape down the bowl with a spatula.
  4. In a small bowl, mix vinegar and baking soda. Be careful as it will fizz so don't do it in a shallow bowl. Add vinegar mixture to the cake batter and stir well to combine. Fill cupcake cups with cake batter until they are a little under 3/4 full. Place muffin tins in your preheated oven. Bake for approximately 20, rotating pans halfway through. The cupcakes are done when you are able to pat the tops and the cake springs back up. If it sinks down they are not yet complete. Or you can insert a toothpick into the center of a cupcake in the center of the tin and if it comes out clean they are done.
  5. Cool the cupcakes in their tins on a wire rack for 10 minutes then remove and allow to cool completely before frosting.
  6. Make sure all of your frosting ingredients are at room temperature.
  7. In a mixing bowl, mix butter on medium speed until light and creamy.
  8. Add cream cheese and mix until fluffy.
  9. Slowly add the sugar, one cup at a time. Continue to mix.
  10. Finally, add the vanilla extract to the mixture and mix until it has a creamy consistency. Put a small amount of the red food dye in the mix, mix only just so the dye swirls around the frosting. Use to cover the cooled cupcakes.
Original Recipe 

Hope you enjoy these as much as i did! Let me know how yours turn out! 

Joely <3